- standardize page names, rework documentation structure, update TOC
- use same example paths everywhere
- level 1 titles on all pages
- fix broken links
- .md suffix on all page links (works both from readthedocs and github repository views)

**Server:**

A full and concise installation guide with examples is a frequent request. The documentation should provide such a guide for basic installation needs, while explaining alternative/advanced configuration at the end. Links to reference guides and documentation should be used more frequently to avoid recommending an outdated or excessively complex configuration.

- server: move most server-related info to server-configuration.md, cleanup/shorten
- server: update list of php dependencies/libraries, link to composer.json
- server: installation: support 3 install methods (from release zip, from sources, using docker)
- server: installation: use rsync instead of mv as mv results will change depending of taget directory already existing or not
- server: add example/basic usage of certbot
- server, upgrade, installation: update file permissions setup, use sudo for upgrade operations in webserver document root
- server: apache: add comments to configuration, fix and factorize file permissions setup, set cache-control header, deny access to dotfiles, add missing apache config steps, add http->https redirect example
- server: nginx: refactor nginx configuration, add comments, DO log access to denied/protected files
- server: add links to MDN for x-forwarded-* http headers explanation, cleanup/clarify robots.txt and crawlers section
- server: bump file upload size limit to 100MB we have reports of bookmark exports weighing +40MB - i have a 13MB one here
- server: simplify phpinfo documentation
- server: move backup and restore information to dedicated page
- docker: move all docker docs to Docker.md, simplify/ docker setup, add docker-compose.yml example, replace docker-101 with docker cheatsheet
- troubleshooting: move all troubleshooting documentation to troubleshooting.md

**Usage:**

- index: add getting started section on index page
- features/usage: move all usage-related documentation to usage.md, add links from the main feature list to corresponding usage docs, clarify/reword features list
- shaarli configuration: add note about configuring from web interface

**Removed:**

- remove obsolete/orphan images
- remove obsolete shaarchiver example
- remove outdated "decode datastore content" snippet

**Development:**

- development: move development-related docs (static analysis, CI, unit tests, 3rd party libs, link structure/directory, guidelines, security....) to dev/ directory
- development: Merge several pages to development.md
- **Breaking change?:** remove mentions of 'stable' branch, switch to new branch/release model (master=latest commit, release=latest tag)
- **Breaking change?:** refer to base sharing unit as "Shaare" everywhere (TODO: reflect changes in the code?) doc: update featues list/link to usage.md for details
- development: directory structure: add note about required file permissions
- .travis-ci.yml: add comments
- .htaccess: add comment
2.9 KiB
Installation
Once your server is configured, install Shaarli:
From release ZIP
To install Shaarli, simply place the files from the latest release .zip archive under your webserver's document root (directly at the document root, or in a subdirectory). Download the shaarli-vX.X.X-full archive to include dependencies.
wget https://github.com/shaarli/Shaarli/releases/download/v0.10.4/shaarli-v0.10.4-full.zip
unzip shaarli-v0.10.4-full.zip
sudo rsync -avP Shaarli/ /var/www/shaarli.mydomain.org/
From sources
These components are required to build Shaarli:
- Composer to manage third-party PHP dependencies.
- yarn to build frontend dependencies.
- python3-virtualenv to build local HTML documentation.
Clone the repository, either pointing to:
- any tagged release
latest: the latest tagged releasemaster: development branch
# clone the branch/tag of your choice
$ git clone -b latest https://github.com/shaarli/Shaarli.git /home/me/Shaarli
# OR download/extract the tar.gz/zip: wget https://github.com/shaarli/Shaarli/archive/latest.tar.gz...

# enter the directory
$ cd /home/me/Shaarli
# install 3rd-party PHP dependencies
$ composer install --no-dev --prefer-dist
# build frontend static assets
$ make build_frontend
# build translations
$ make translate
# build HTML documentation
$ make htmldoc
# copy the resulting shaarli directory under your webserver's document root
$ rsync -avP /home/me/Shaarli/ /var/www/shaarli.mydomain.org/
Set file permissions
Regardless of the installation method, appropriate file permissions must be set:
# by default, deny access to everything to the web server
sudo chown -R root:www-data /var/www/shaarli.mydomain.org
sudo chmod -R u=rwX /var/www/shaarli.mydomain.org
# allow read-only access to these files/directories
sudo chmod -R g+rX /var/www/shaarli.mydomain.org/{index.php,application/,plugins/,inc/}
# allow read/write access to these directories
sudo chmod -R g+rwX /var/www/shaarli.mydomain.org/{cache/,data/,pagecache/,tmp/}
Using Docker
Finish Installation
Once Shaarli is downloaded and files have been placed at the correct location, open this location your web browser.
Enter basic settings for your Shaarli installation, and it's ready to use!
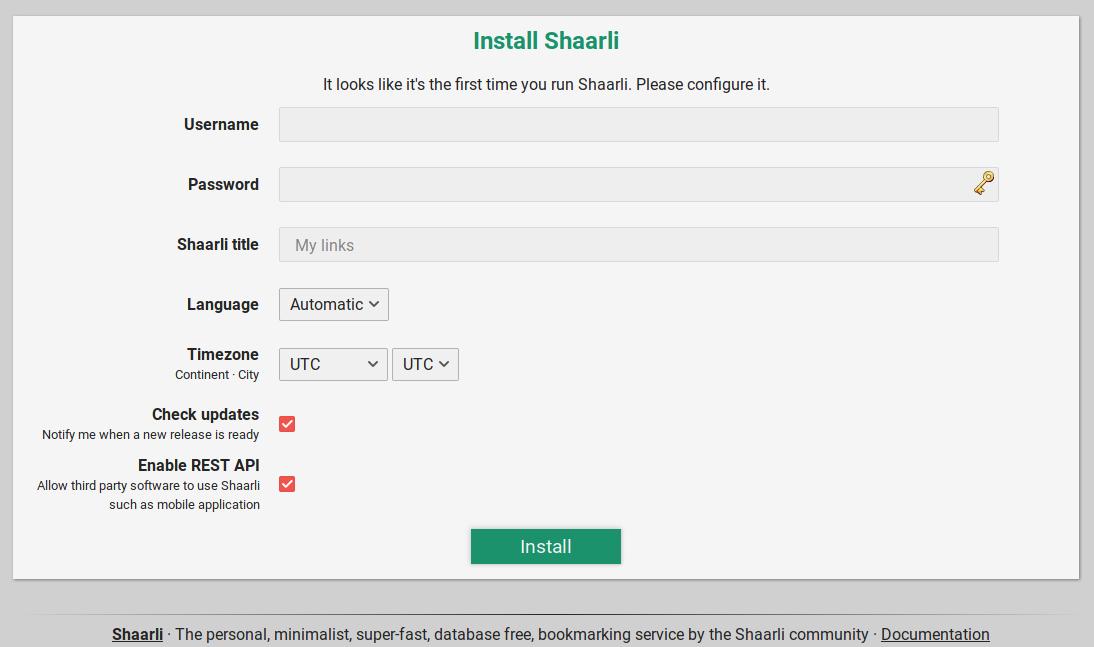
Congratulations! Your Shaarli is now available at https://shaarli.mydomain.org.
You can further configure Shaarli, setup Plugins or additional software.